Add a wait to a flow
A delay makes the flow wait before it carries on: for example, send a reminder 30 minutes later, or a follow-up the next day. If the customer replies first, you can cancel the message.
Add a delay
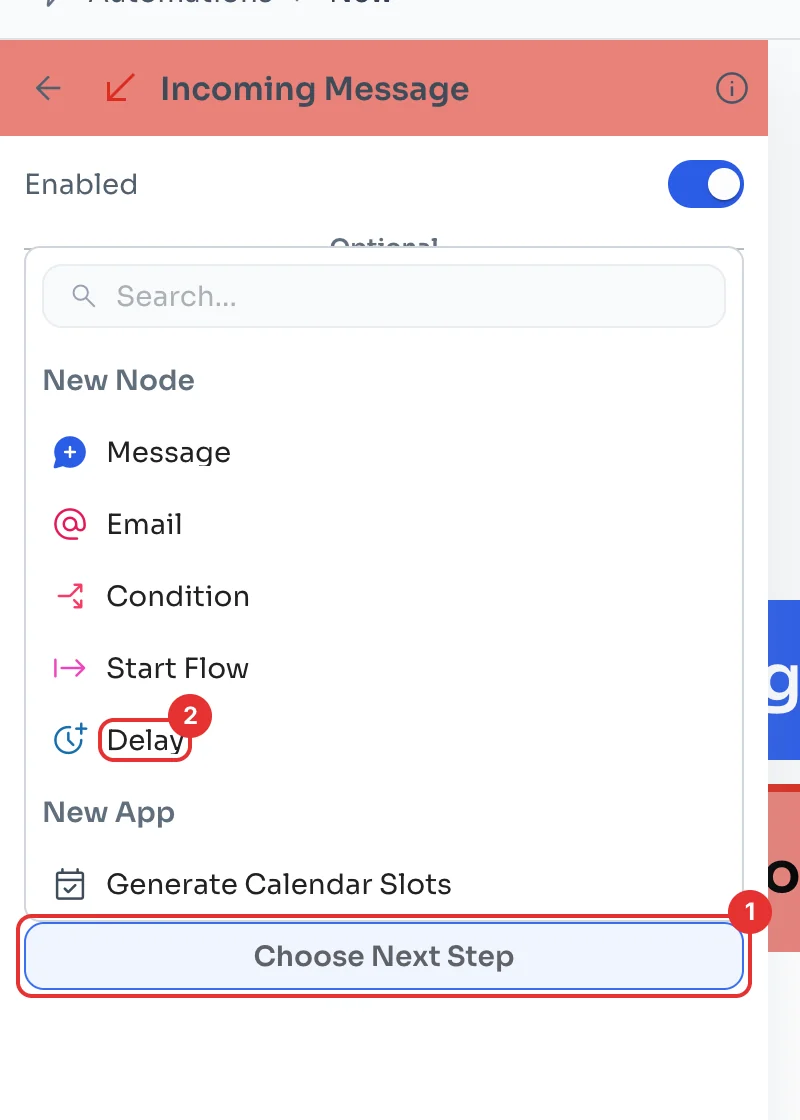
In a flow that starts with a trigger (see Create your first message flow), click the trigger card to open its panel, click Choose Next Step (1) and pick Delay (2).
Choose how long it waits
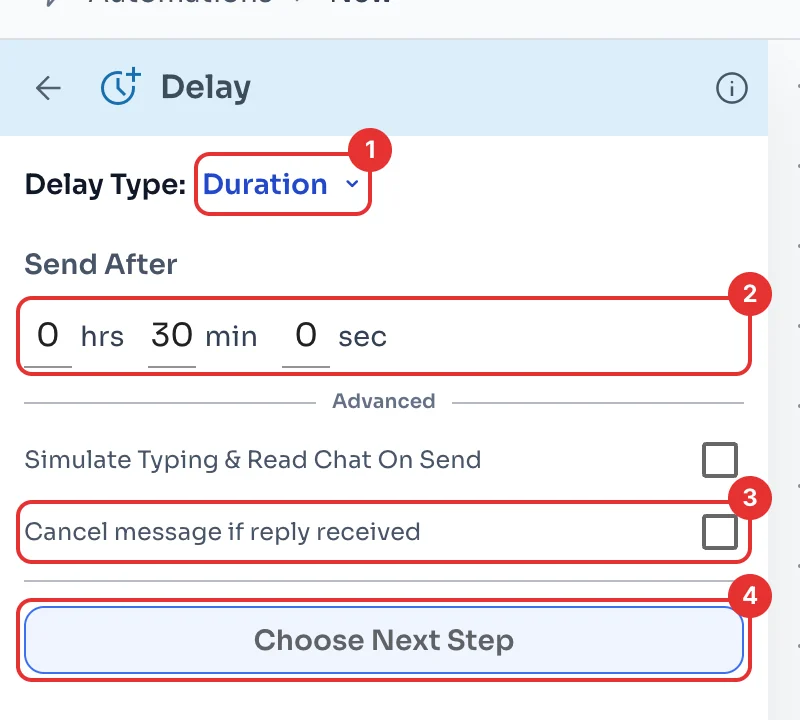
Delay Type (1) is set to Duration. Under Send After (2), type the hours, minutes and seconds; here, 30 minutes.
Tick Cancel message if reply received (3) so the message that follows is not sent if the customer writes to you during the wait. Then click Choose Next Step (4) for the message that comes after the wait, and Save.
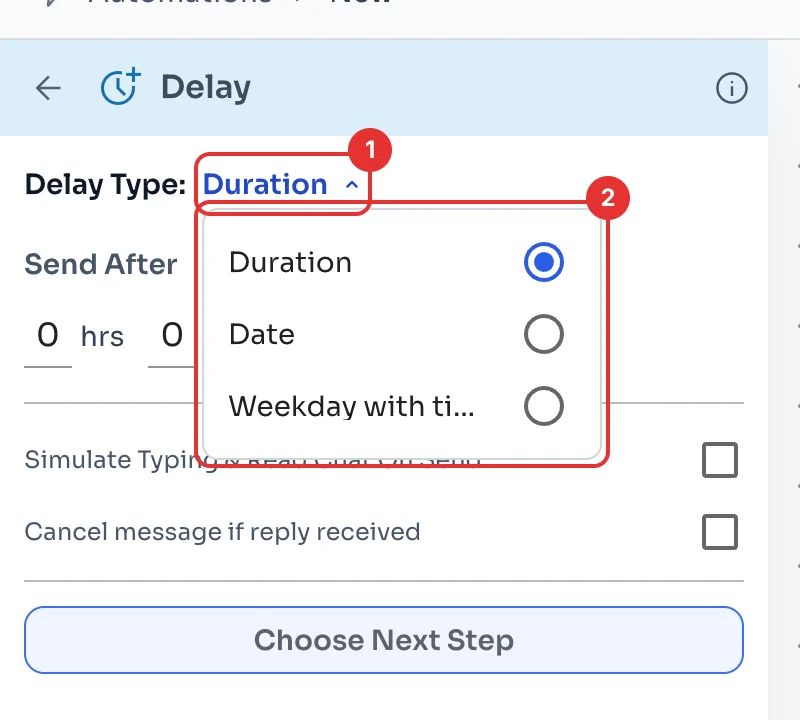
Or wait until a date or a day
Open Delay Type (1) to pick another type (2): Duration, Date to wait until a date and time, or Weekday with time to wait, for example, until next Monday at 10.