Create your first message flow
A message flow holds one or more messages, with buttons, images or steps. You can start it with a message you send yourself, or with a trigger so it runs on its own. Pick how it starts and we show you only those steps.
Create a new flow
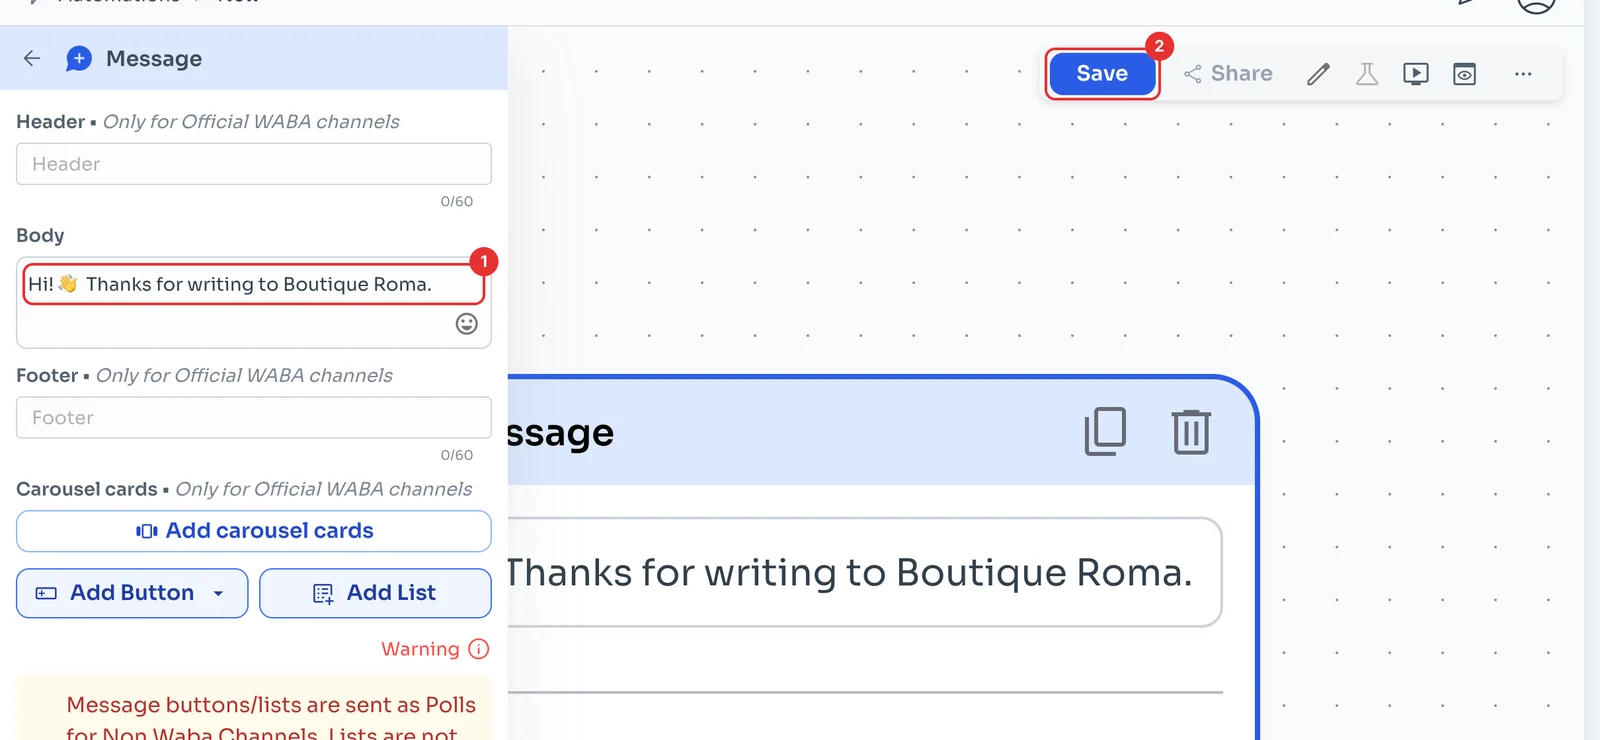
In the menu, go to Automations (1). Under Message Flows, click Create New Message Flow (2).
Start from scratch
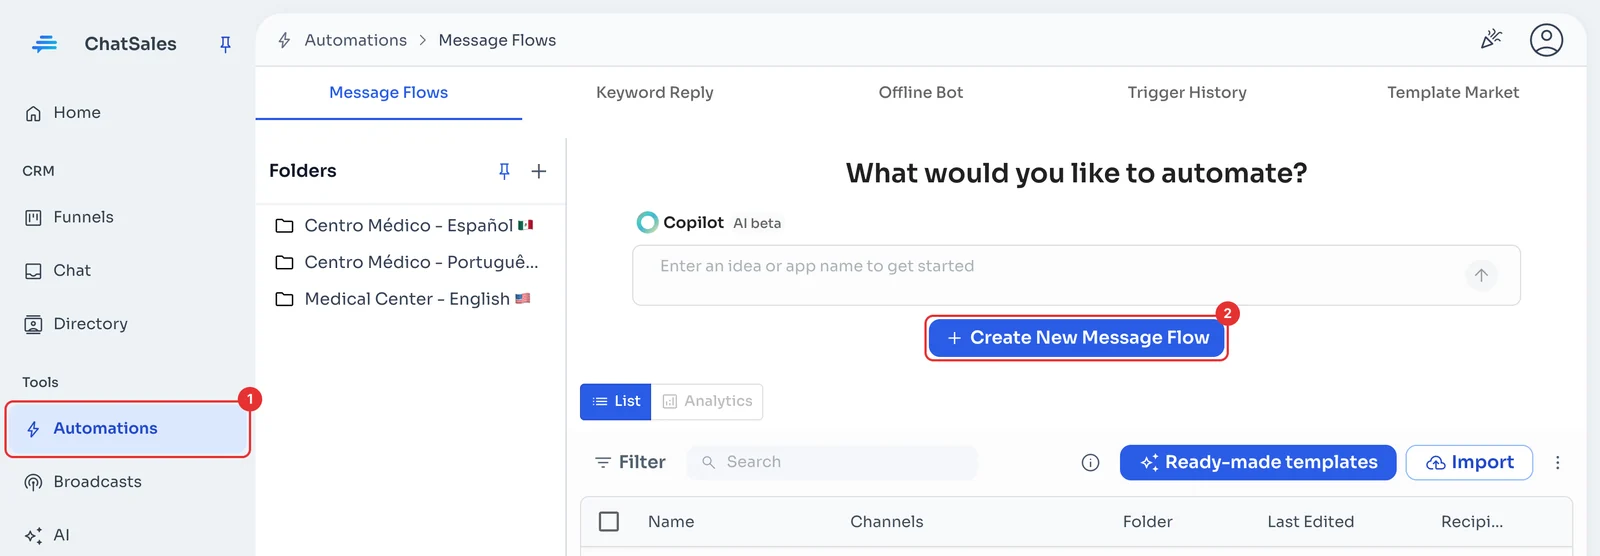
In Choose your goal, click Start from scratch (1). Want a shortcut? Start with AI (2) builds the flow from what you ask for, and below there are ready-made templates for common cases.
Pick the first step
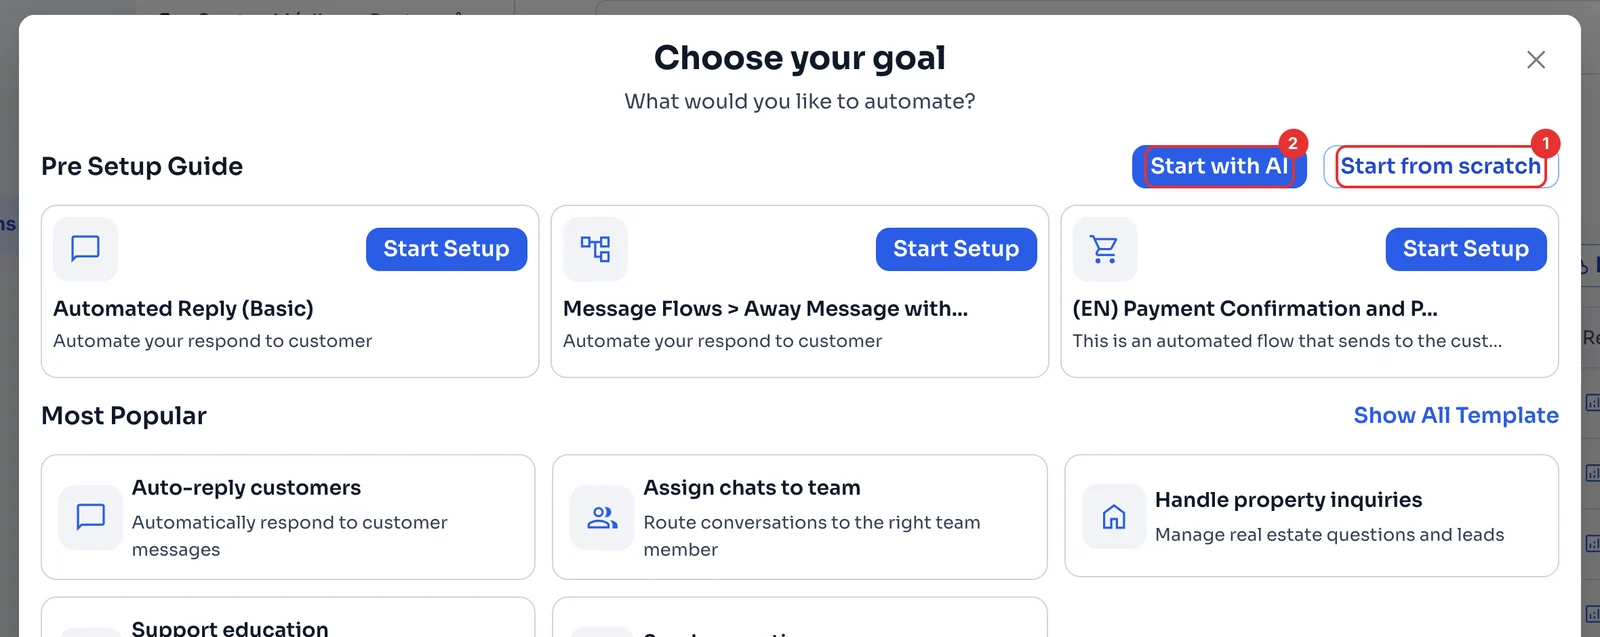
The canvas shows Choose Starting Step: Message (1) starts with a message; Trigger (2) makes the flow run on its own when something happens.
Write your message and save
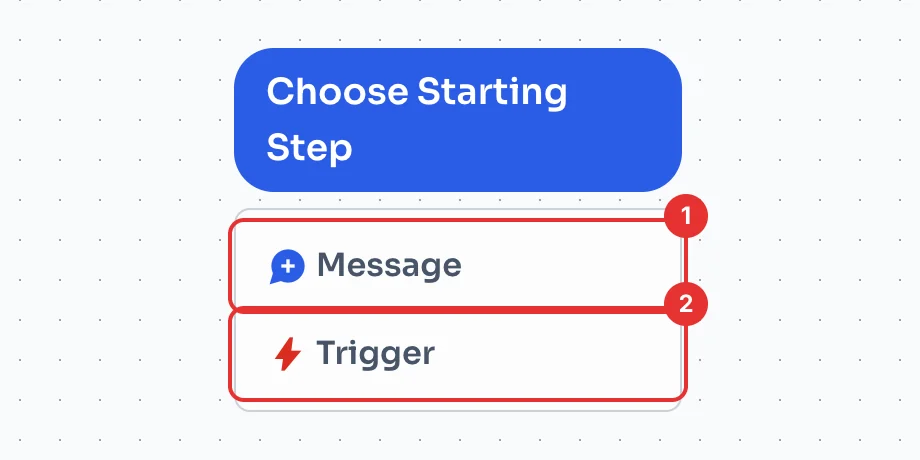
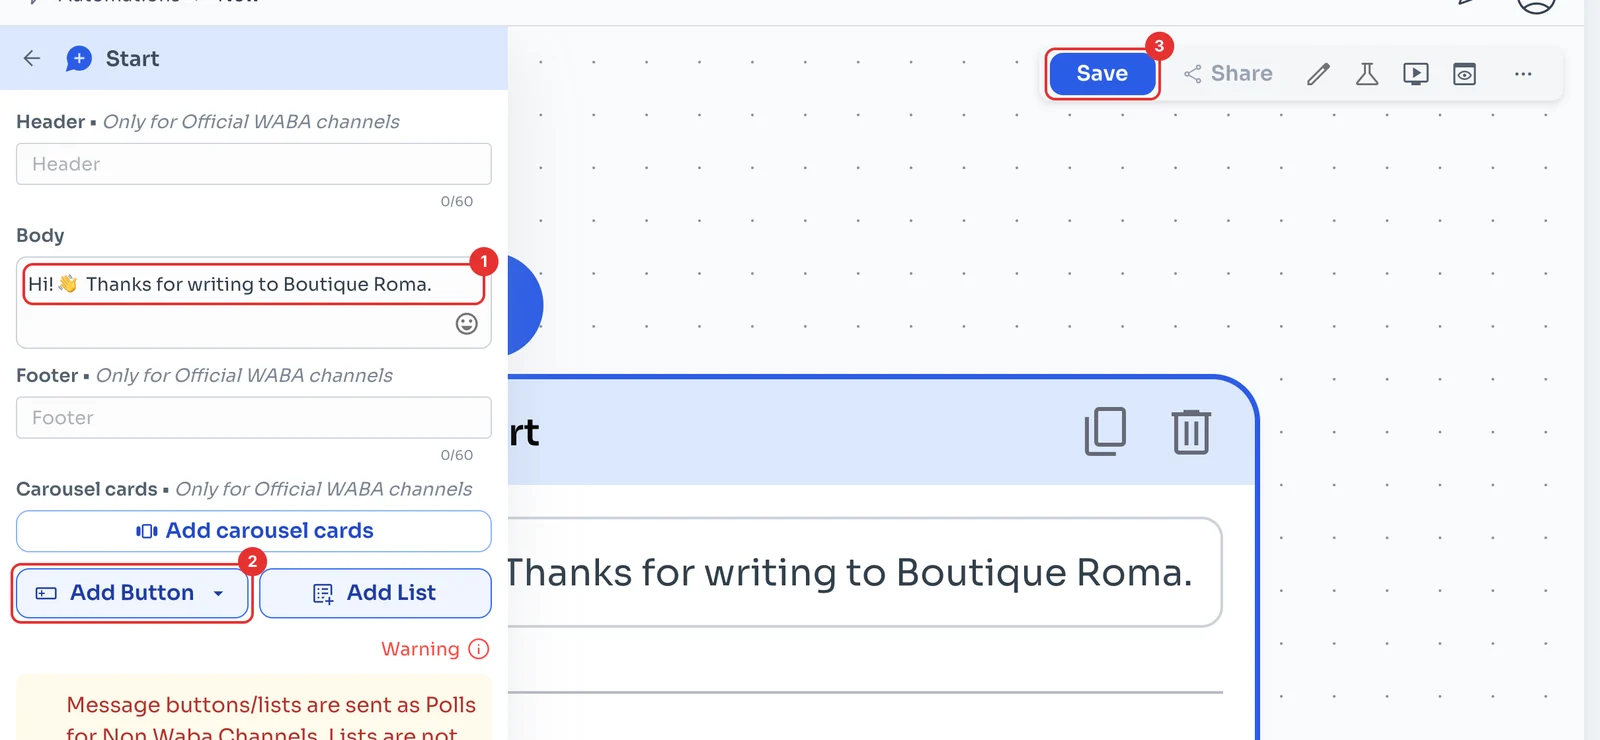
Pick Message and click the card to edit it. Type your text in Body (1); Add Button (2) adds quick replies, and below you can add an image, video or audio.
Click Save (3). To send it, open a chat and type / in the message box (see Send your first message), or pick it in a broadcast.
Choose the trigger
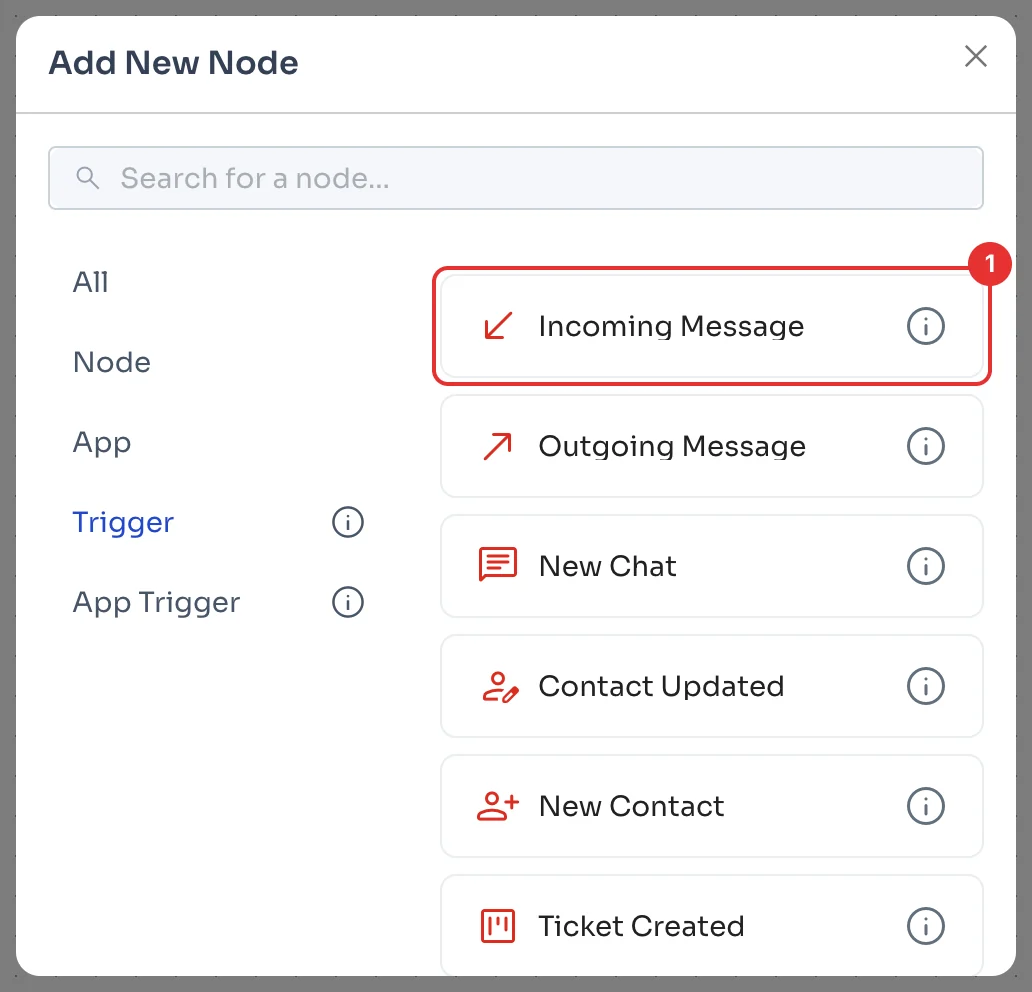
Pick Trigger. In the list, choose when the flow runs, for example Incoming Message (1), when a customer writes to you, or New Chat, when a new chat starts.
Add the next step
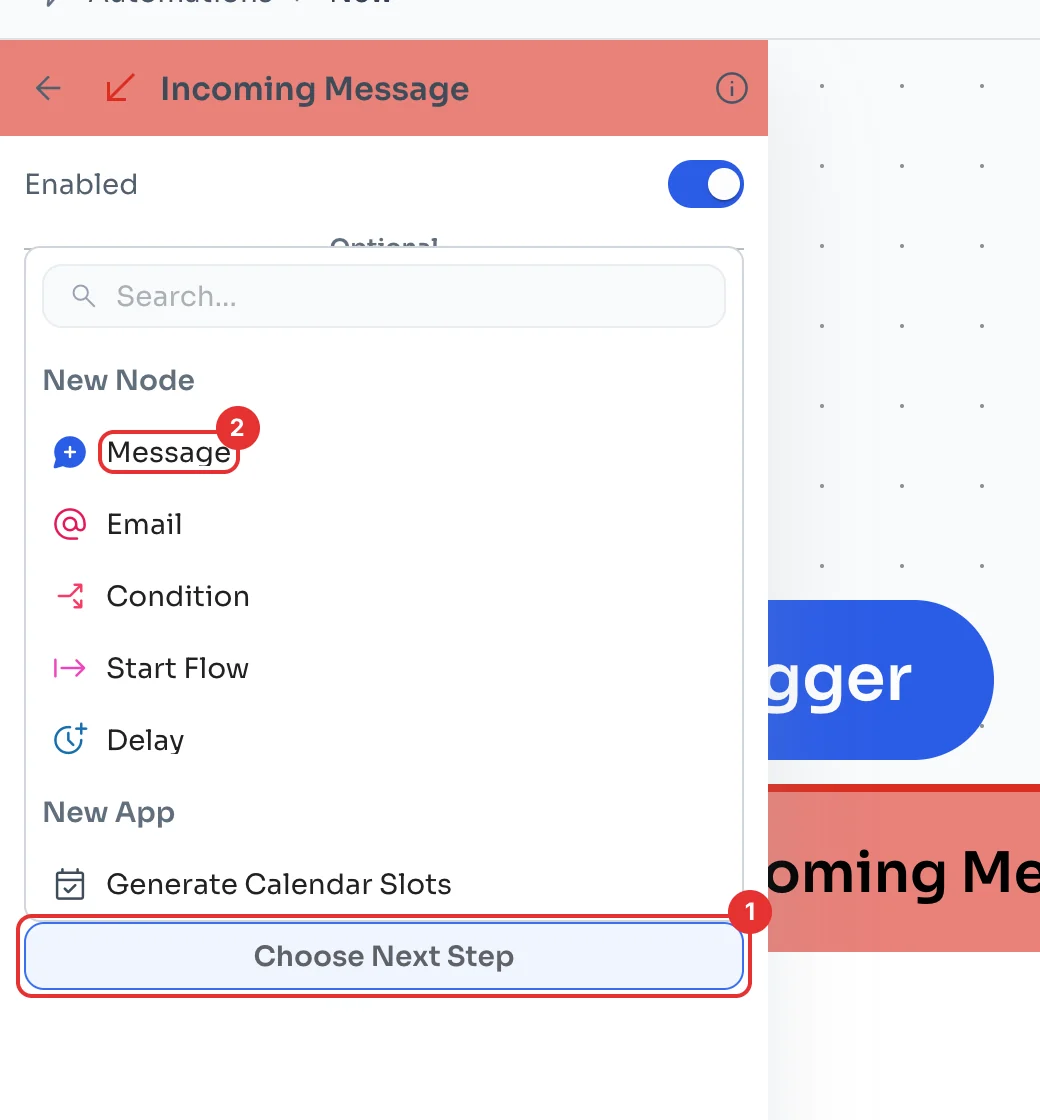
Click the trigger card to open its panel. Click Choose Next Step (1) and pick Message (2). You can also chain a condition, a delay or another flow.
Open the linked message
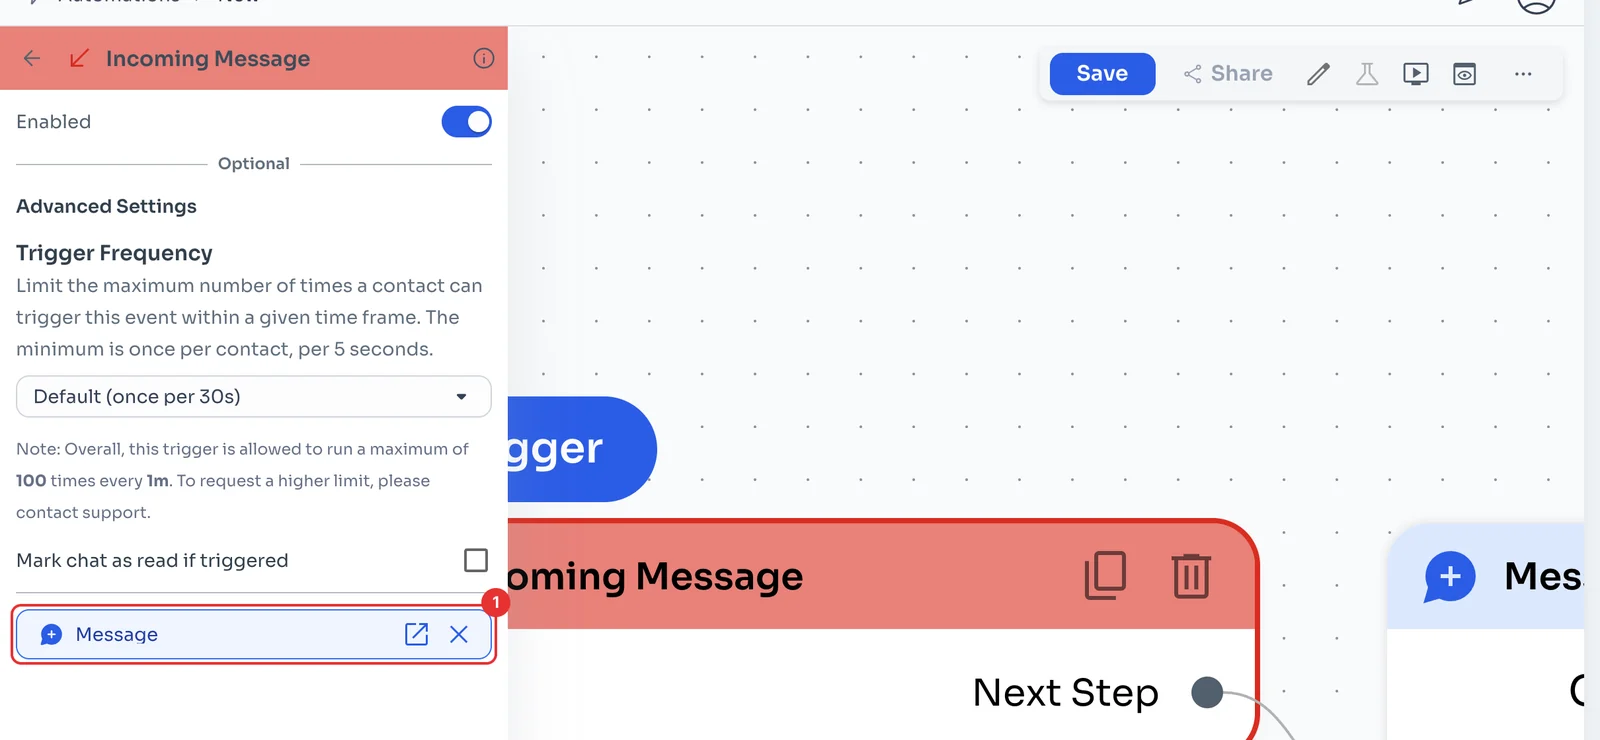
The message is now linked to the trigger and shows in its panel (1). Click the open icon to edit it.
In the same panel, Trigger Frequency limits how often one contact can set it off: by default, once every 30 seconds.
Write the message and save
Type your text in Body (1) and click Save (2). From then on the flow runs on its own when what you picked happens.